 Wastime
Review and edit your history
Every purchase you save stays in the history together with the time it took. Looking back over it a week or a month later says more than any single price did, and when a number turns out wrong, the purchase can be put right where it is.
Before you start
The history fills up with the purchases you save, and Turn a price into hours of work shows how to save the first one.
Steps
Open your history
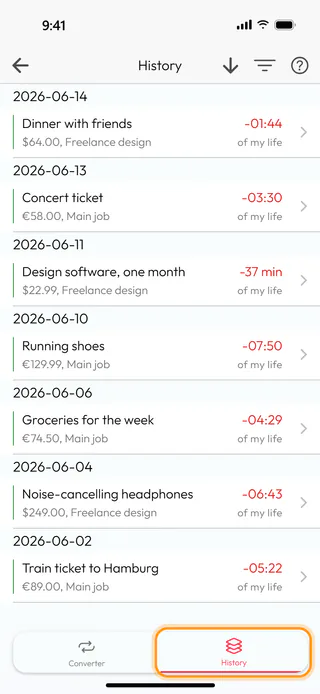
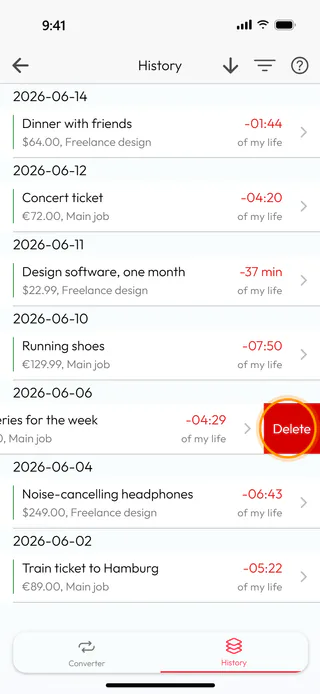
In the converter, tap History at the bottom of the screen. The purchases are grouped by day, the newest at the top. Each one shows the time it took in red, with a minus in front, and under its name the amount and the rate it was counted with.
Correct a purchase
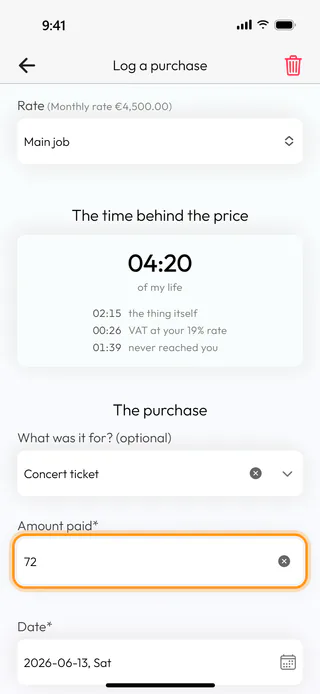
Tap a purchase, and it opens in Log a purchase, the same form you saved it with. Change the amount in Amount paid*, and the time above it changes straight away. It is counted at the rate as it stood when you saved the purchase, so a raise you have entered since then leaves old purchases as they were. In Rate you can also move the purchase to another of your rates. When that rate counts in another currency, the app asks first and clears the amount, since it has no exchange rates to carry the old one across.
Move it to another day
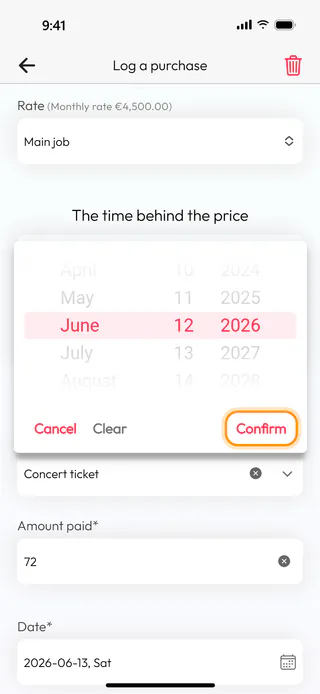
Tap the line under Date* to open the wheels, turn them to the day the purchase really happened, and tap Confirm.
Save the changes
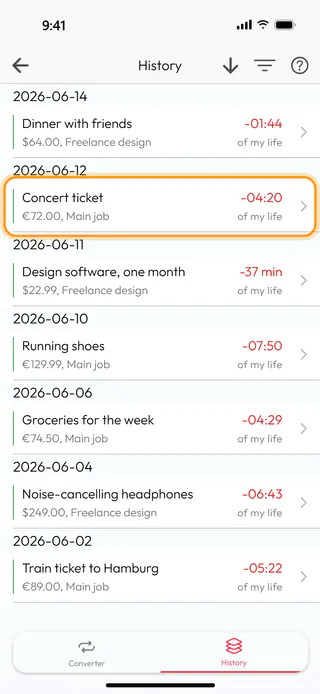
Tap Save. The app answers with "Saved", the form closes, and the purchase moves to the day of its new date with its new time. If you step back without saving, the app asks whether to leave your changes behind.
Delete a purchase
Swipe a purchase to the left and tap Delete, or open it and tap the bin at the top. The app asks "Delete this conversion?", and Yes removes it. There is no way to bring a deleted purchase back, so it is worth a second look before you answer.
Filter the list
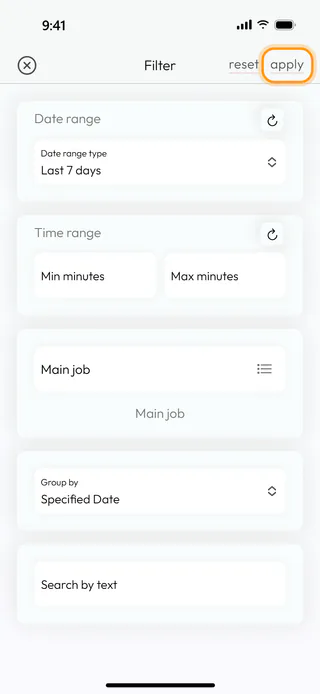
Tap the filter button at the top, the one with three lines. In Date range type, pick a period such as Last 7 days, which always counts back from today, and tap the field with the list icon to choose rates in Select rates. Time range keeps purchases by how long they took, in minutes, so Min minutes 240 leaves the ones that cost you four hours or more. Group by decides which date the list is grouped by, and Search by text looks for words in what each purchase was for. Tap Apply to see the result. Reset clears the filter, and Apply after it brings the whole list back.
Change the order
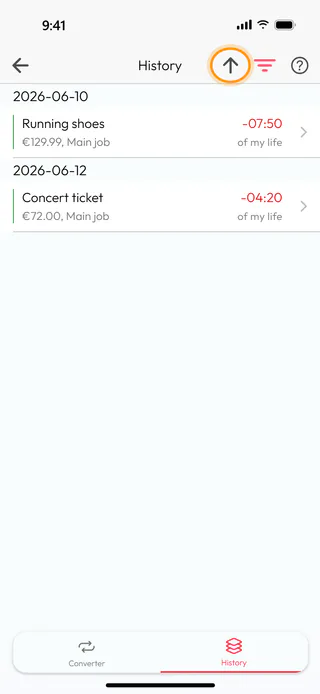
The arrow at the top turns the list around, so the oldest purchases come first, and a second tap turns it back. While a filter is on, its button at the top is filled in. The app remembers the order and the filter until you change them.
What's next
When your pay changes, the purchases you saved can be counted again at the new rate, and Change or delete a rate shows how. The Money to Time Converter page says more about the idea behind it.

